iOS App Store Review Guidelines 2026: Checklist to Pass Review & Avoid Rejection

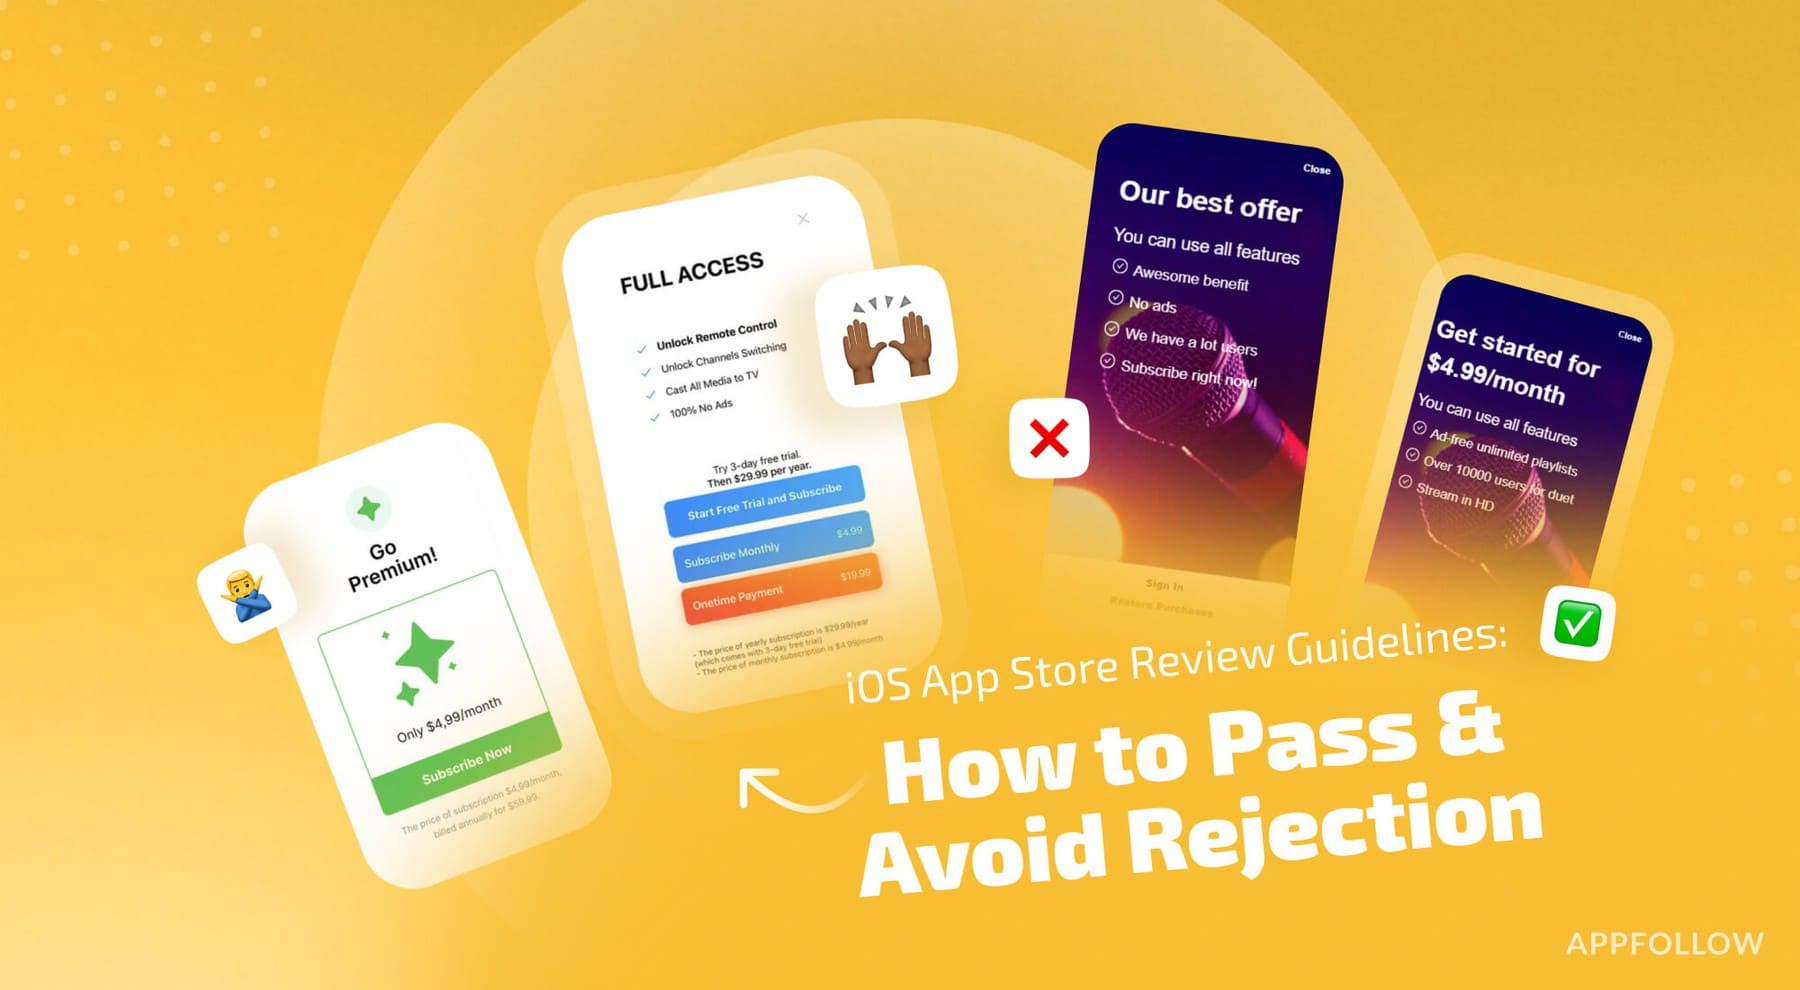
Table of Content:
- What are the App Store Review Guidelines?
- What you need to know about the App Store review guidelines
- What changed in App Store Review Guidelines in 2025-2026?
- How to prepare app for AppStore review & pass it on the 1st try
- How your iOS app gets verified for the App Store
- How long does App Store review take in 2026?
- After approval: watch what the release does to reviews, ratings, and visibility
- App Review Notes template
- Top reasons your app might flop in the iOS review process
- 5 checks before you submit
- What’s New in App Store Review Guidelines (2026 Edition)
Last updated July 2, 2026. Guidelines are checked July 2026. Reviewed by Yaroslav Rudnitskiy, Senior Professional Services Manager, AppFollow
Apple does not reject apps because it wants to ruin your launch week. It rejects apps when the reviewer cannot verify what the app does, cannot access the feature, sees a mismatch between the build and the metadata, or finds a rule risk in payments, privacy, safety, spam, or design.
That is the job of the App Store Review Guidelines: they turn “is this safe and useful for users?” into review criteria Apple can apply to every new app and every update.
This guide is the practical version. You will see what Apple checks, what changed in the latest guidelines, how long review usually takes, and the exact pre-submit checklist to run before you send a build to App Review.
What are the App Store Review Guidelines?
The App Store Review Guidelines are Apple’s rules for approving iOS, iPadOS, macOS, tvOS, watchOS, and visionOS apps. Apple groups them into five areas: Safety, Performance, Business, Design, and Legal. Before approval, your app must work as described, use accurate metadata, respect payment rules, protect user data, and avoid spammy or low-value behavior.
What you need to know about the App Store review guidelines
A small release can still come back with a big question. The build may run perfectly for your team, while the reviewer sees a blank account, a purchase they cannot open, or a screenshot of a feature that is not in the submitted version. Apple reviews new apps and updates against the same five areas of its App Review Guidelines. It can also investigate apps already on the store when problems surface.
Before you package the next version, put three things side by side: the actual release build, the App Store listing, and the path a reviewer will follow from a fresh install. If any two disagree, fix that mismatch before pressing Submit for Review. The historical changes below explain why checks that worked for an older release may need another look today.
A timeline of App Store review guidelines history drama
Apple’s been evolving its app store review guidelines hardcore since they first launched the App Store in 2008. But things got spicy starting around 2017, when privacy became the headliner.
The TL:DR on major changes that still trip up even seasoned devs:
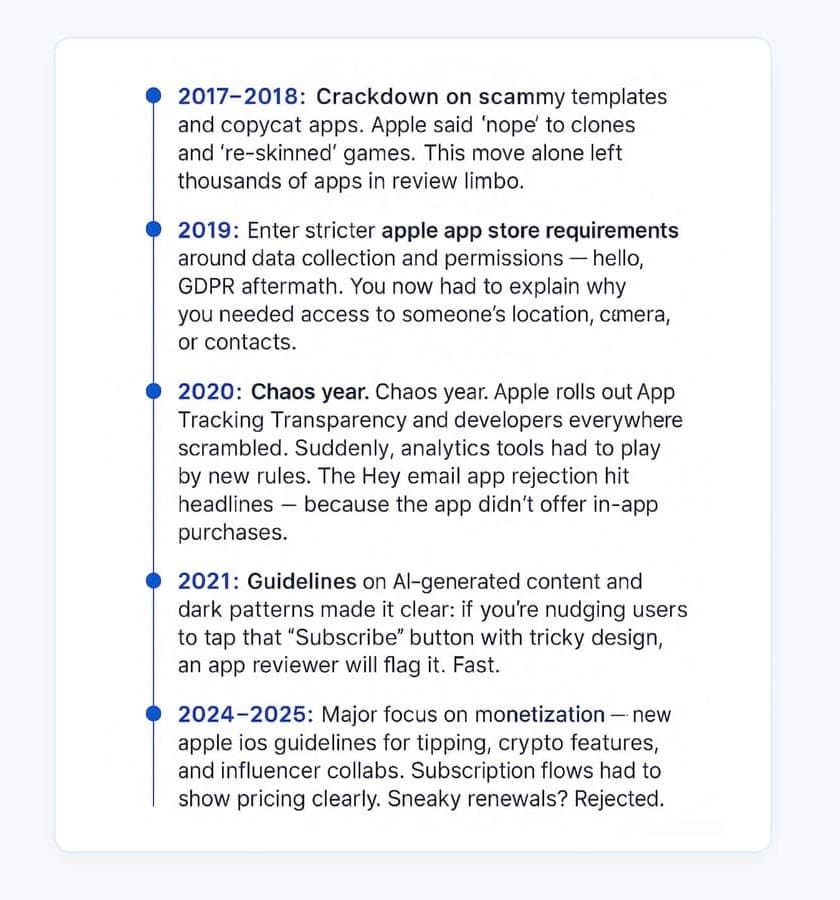
Why does all this matter now?
Because what used to be okay might land you in processing purgatory today. And the last thing you want is a 5-day delay just because your “free trial” CTA wasn’t transparent enough.
How these changes hit devs like you:
- Review times spike right after major updates. You’ll see Reddit threads full of “is anyone else stuck at ‘Waiting for Review’?” because apple reviewers are adjusting to new enforcement.
- Apple’s communication? Let’s just say it’s… selective. Sometimes they drop a blog post. Other times? Surprise! You get a rejection with a link to a section of the guidelines you didn’t know changed last week.
- Devs who watch the patterns — you know, checking in with other Apple Developer community folks, reading those updates in App Store Connect — tend to avoid the landmines.
If you’re thinking, “Okay cool, but does all this affect my launch?” — oh, it does. These evolving Apple app store review guidelines aren’t just red tape — they’re the playbook that decides whether your app goes live… or gets stuck in “Waiting for Review” hell.
Because here’s the truth no one tells you: ignoring the guidelines doesn’t just risk a rejection. It risks your budget, your timeline, and your reputation. So let’s talk about why you need to care — whether you’re submitting your first build or your fiftieth.
Why Apple’s review guidelines matter today — e.g. for app rejections, delays, monetization changes
An avoidable rejection is a release-planning problem, not just a compliance footnote. Apple’s 2025 App Store Transparency Report records 9,100,620 app submissions reviewed and 2,093,244 submissions rejected. Performance was cited in 1,354,418 rejection records, far more than any other listed guideline section. One submission can be rejected for more than one reason, and the counts are submissions rather than distinct apps. Read the figures as a map of where to test, not as your app’s personal probability of rejection.
Apple’s 2025 report | Count | Pre-submit action |
|---|---|---|
Submissions reviewed | 9,100,620 | Budget for a complete reviewable release, including the reviewer path. |
Submissions rejected | 2,093,244 | Hold campaign launch until the intended version reaches the chosen release state. |
Rejections citing Performance | 1,354,418 | Run the release build on a real device with a clean account and live backend. |
Rejections citing Design | 415,532 | Test the category’s actual value and the 4.3 spam/4.2 minimum-functionality risks. |
A useful preflight has an owner for each risk. Engineering proves the build works. Product marketing compares screenshots, description and price to that exact build. The person who submits it verifies the test account, Review Notes and release settings. Keep a record of what each person checked, because a reviewer’s question is much easier to answer when you can reproduce the screen they saw.
What changed in App Store Review Guidelines in 2025-2026?
Apple’s guidelines have a revision date. Your submission has a storefront, an account flow and a set of live screens. Put those together before you infer that a headline about “new rules” applies to your build. Apple’s current App Review Guidelines page says it was last updated Jun 8, 2026; the release note names the sections changed on that date.
Apple update or current capability | What the source actually says | Check on this build |
|---|---|---|
May 1, 2025: US purchase links | Apple updated 3.1.1, 3.1.1(a), 3.1.3 and 3.1.3(a) for buttons, external links and calls to action in US storefront apps. | Record each storefront where the purchase screen appears. Review the applicable IAP rule and any regional entitlement before reusing one paywall across markets. |
Nov 13, 2025: privacy and creator content | Section 5.1.2(i) clarifies disclosure and explicit permission before sharing personal data with third parties, including third-party AI. The update also covers creator content age controls, mini apps and copycat branding. | Trace the data that leaves the app, show where consent occurs, then check moderation, age gates and brand assets if those features exist. |
Jun 8, 2026: 4.3 spam and safety | Apple clarified 4.3(a) and 4.3(b), including examples of indistinguishable or low-value app submissions; it also revised kid and teen safety guidance and clarified 4.5.3 Live Activities misuse. | For a crowded category, demonstrate a meaningful difference in the product itself. If you use Live Activities or user-generated content, test the relevant safety flow. |
Current submission capability, not a new 2026 rule | Apple lets teams submit certain items, including In-App Events and custom product pages, without a new app version; accepted items can continue if another item has an issue. | Decide whether the change needs a binary. Submit the appropriate item in App Store Connect and check its own status. |
A privacy prompt does not prove compliance on its own. Compare the purpose string, actual data flow, privacy policy, App Privacy answers and reviewer notes. The same exercise catches a paywall that promises one price in the listing and displays another in the build.
How to prepare app for AppStore review & pass it on the 1st try
Let’s be real — getting through Apple app review isn’t just about a great app. It’s about understanding the invisible playbook behind the scenes. Because every developer who's been burned by a surprise rejection will tell you: the rules are real, and they’re enforced hard.
So if you want to pass and review without rejections, delays, or back-and-forth drama, you need more than just clean code. You need prep worthy of the Apple app store requirements — and a bit of insider sauce.
Good news? I’ve got you. Let’s break it all down — including pro tips from the App Store experts who live and breathe this review process every day.
Run this as a release-candidate check, not a memory test. Take the build you plan to submit, install it on a clean device, and put the listing and App Store Connect answers next to it. Each row should end with a screen or record you can show to the teammate who owns submission.
Reproduce this before submission |
Evidence to keep |
|---|---|
Sign in with the review account, open the core feature, reach the purchase screen, and repeat the route after a fresh install. Keep every required backend service running during review. |
Build number, device and OS, working credentials in App Review Information, and the exact route to each gated feature. |
Compare every current screenshot, the description, “What’s New” text, privacy information, and any featured paid content against the submitted build. |
A side-by-side capture of the listing and the corresponding screen in the release candidate. |
Trigger the purchase path in each relevant storefront and confirm that every product is complete, visible, and configured for review. Before using a link to another purchase method, check the rules for that storefront, app type, and any required entitlement. |
Product status, storefront, paywall capture, entitlement details where relevant, and the purchase route provided in Review Notes. |
4.3 Spam and 4.2 Minimum Functionality If the category is crowded, show what users can actually accomplish in your app that they cannot do in a near-identical product or a repackaged website. |
A short walkthrough of the app’s distinctive workflow in the submitted build, not a general claim about having a nicer interface. |
If your app uses Google Sign-In, Facebook Login, or another third-party service to create or authenticate the user’s primary account, verify that it also offers an equivalent login option with the privacy features Apple specifies. This requirement is not a blanket ban on third-party login, and Apple lists exceptions for certain enterprise, education, government-ID, and service-specific apps. |
The login screen, the data collected by each option, and the exact Guideline 4.8 exception if your app relies on one. |
5.1 Privacy and 1.2 User-Generated Content Decline a sensitive permission and test the fallback. If users can post content, also test reporting, blocking, moderation, and access to support contact information. |
Purpose strings, consent screen, privacy policy, App Privacy answers, and the complete moderation path. |
Here is the sort of mismatch that survives a code review: your screenshot shows the new subscription comparison, but the reviewer’s account is assigned to the old paywall experiment. The app launches. The claim is still untestable. Set the review account to the right cohort, document the feature flag in Review Notes, and repeat the route from a clean install before you submit.
Test your app like you’re Apple’s QA team trying to break it. Because they will
Let’s start with the part everyone thinks they’ve covered… but still get rejected for: the build.
Here’s the deal — app reviewers review the submitted build; they are not there to debug it for you. If the app crashes, shows an obvious technical problem, or blocks access to its core functionality, the submission can fail Guideline 2.1 on App Completeness. Test the exact release candidate and give App Review everything required to reach the features you want approved.
Want to avoid that fate? Here’s your test-first checklist:
✅ Run full device testing, not just in simulators — real-world network issues and OS-level quirks can break flows you’d never catch otherwise.
✅ Keep all backend services live, stable, and fast — your app isn’t reviewable if your APIs are sleeping.
✅ Create a working demo/test account, and include credentials + test paths in the Review Notes. Include exact flows reviewers should test.
✅ Double-check permissions (especially camera, mic, health, location, contacts) — and make sure your request dialogs clearly explain why they’re needed.
✅ Confirm in-app purchases (IAP) are complete, current, visible to the reviewer, and functional. If a configured purchase cannot be found or reviewed in the app, explain why in the Review Notes.
Ilia Kukharev, Product Manager at AppFollow:
“One time, a client launched what they thought was a flawless build — sleek UI, clean code, full QA passed. But during the store review, the app couldn’t fetch user data because its backend didn’t recognize Apple’s IP range. So every test attempt showed a generic error screen — no content, no onboarding, no functionality. The team didn’t include fallback handling, and the reviewer had no idea why the app ‘wasn’t working.’ It sat in review limbo for five days before finally getting rejected.
All they needed was one line in the Review Notes or a whitelisted IP range. You get one shot to make things reviewer-proof. Don’t assume they’ll troubleshoot or guess. Make everything as obvious as possible — or risk wasting your launch window.”
Polish your metadata (because reviewers will read it)
Think of your app listing like your elevator pitch to Apple — if the metadata feels off, inflated, or confusing, you're done. The app store description guidelines aren’t just formalities. They’re the baseline for trust. And Apple’s reviewers do read them — line by line.
Your app’s title, subtitle, description, keywords, and even preview screenshots need to reflect what your app actually does in its current build.
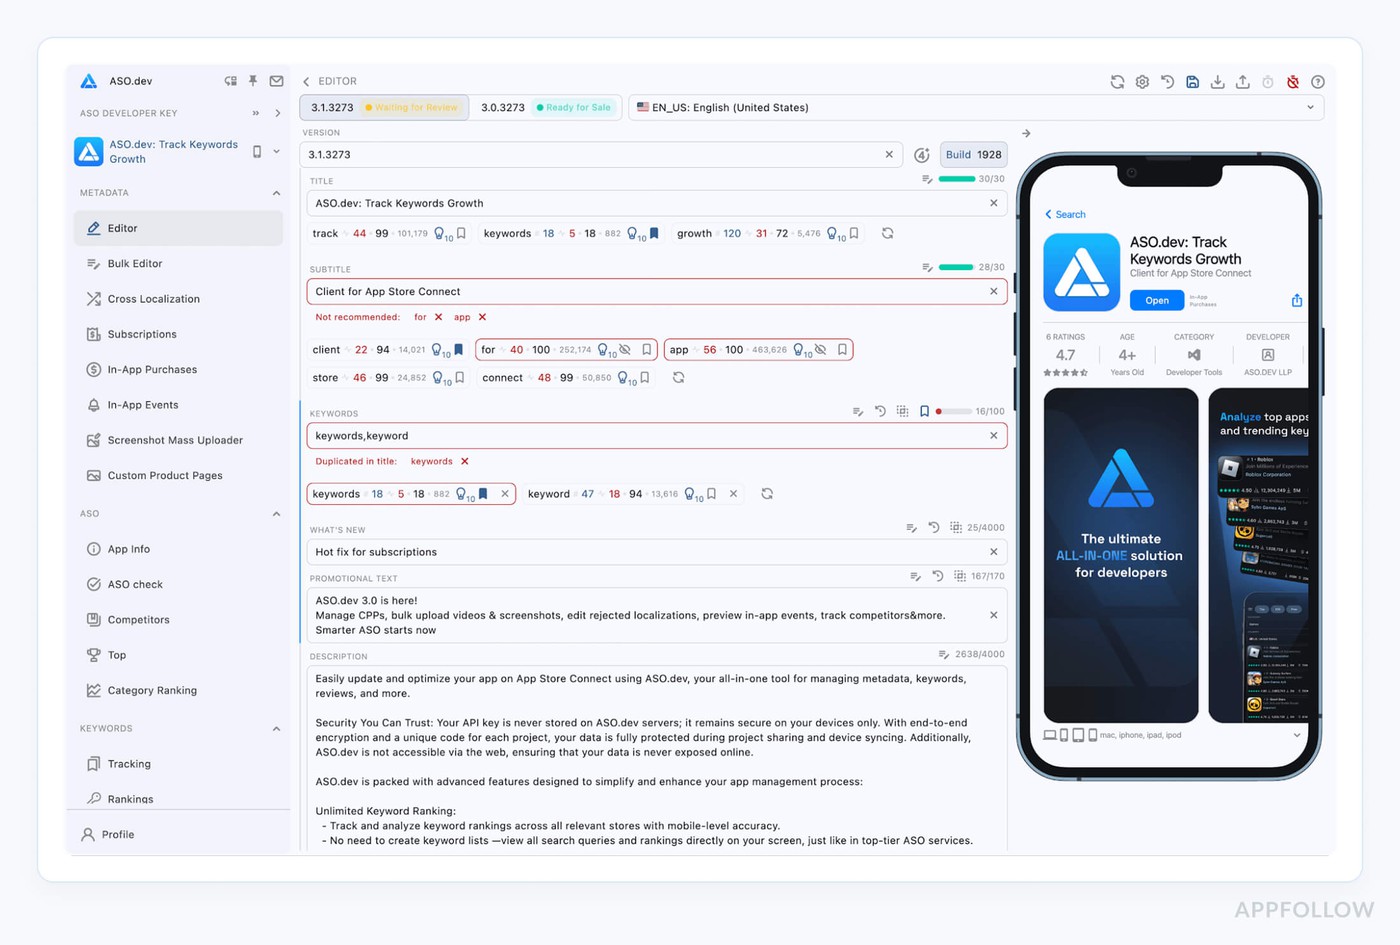
Any mismatch, and you’re looking at delays or rejections under apple app store requirements.
Here’s your metadata hygiene checklist:
✅ Avoid exaggerated or vague claims — “#1 app in the world” or “100% guaranteed results” is an automatic red flag unless you can back it up.
✅ Stay away from aggressive marketing speak in titles or screenshots — Apple hates pushy tactics.
✅ Match your screenshots to real, testable app states — if it’s not accessible in the build you submitted, it shouldn’t be shown.
✅ Follow Apple’s rules on icons, age ratings, content warnings, and other details laid out in the apple ios guidelines.
✅ Localize your metadata for target regions — Apple prioritizes user relevance, and this helps conversion and compliance.
Also — don’t try to pull a fast one post-approval. Changing your description, screenshots, or feature list after the fact without a resubmission? That’s a violation of the app store marketing guidelines, and yes, it can get your app pulled. Not worth it.
cta_free_trial_yellow
Be reviewer-friendly: make their job ridiculously easy
Here’s what most devs forget: your Apple app store reviews don’t start with your users — they start with Apple. And Apple’s reviewers? They’re not digging for context, they’re not guessing your UX logic, and they’re definitely not emailing you for clarification.
They open your app and test the flows available in the submitted build. If a required account, feature, purchase, or piece of hardware is inaccessible, the review may stop until you provide working access and clear instructions.
If you want a smooth pass and review experience, your mission is simple: make your app so review-ready it practically walks itself through the process.
Here’s what that actually looks like:
✅ Add a demo login and full access credentials in the Review Notes. If your app requires sign-up, skip the friction and give them a ready-to-go test account.
✅ Include clear testing steps. Where should they start? What should they explore? Are there paywalled features? Show them the path, don’t make them guess.
✅ Explain any “non-standard” flows — like paywalls, dynamic content, or gated onboarding. A 2-line note explaining why something’s blocked can save you days.
✅ Flag sensitive permissions like health data, geolocation, camera, or microphone — and include why each one is necessary per apple app store requirements.
✅ Add fallback content or states. If content loads only under certain conditions, add a static version or explanatory message.
Lucija Knezic, Senior CSM & Product Strategy Manager at AppFollow:
“Apple reviewers are humans under pressure. “They’ve got limited time and hundreds of builds to get through. If they can’t figure out your app in the first two minutes, they’ll just flag it. The faster they understand what your app does, the faster you get approved. It’s the ultimate pass and review hack.”
If your app uses dynamic logic (like location-based flows or A/B tests), include videos or screenshots in the Review Notes. Apple allows links to visual assets — use that to your advantage.
Respect monetization rules and make every purchase path reviewable
Apple’s payment rules depend on what you sell, the storefront where the app is distributed, and whether a specific entitlement or exception applies. Before submission, map each purchase path to the relevant part of Guideline 3.1, then make the offer, price, and reviewer route consistent across the build and its metadata.
✅ Make subscription pricing and what the user receives clear before purchase
✅ Don’t nudge users with deceptive interface patterns or make cancellation information difficult to find
✅ If the app links to another purchase method, verify that the link is allowed for that storefront and app type and that any required entitlement is in place
✅ Confirm every in-app purchase is complete, current, visible to App Review, and functional; explain any item the reviewer cannot locate in the Review Notes
✅ Avoid fake urgency like “Offer ends in 10 minutes!” unless it’s true
Dzianis Shalkou, Senior Professional Services Manager at AppFollow:
“One team we worked with had everything going for them — great UX, solid performance, clean metadata. But they missed one tiny detail: their App Store metadata listed their monthly subscription at $4.99, while the actual in-app pricing was $5.99. That $1 discrepancy was enough to trigger a rejection under the Apple app store review process. Why? Because it violated transparency rules around pricing and user trust — a core part of the apple app store requirements and app store marketing guidelines.”
They had to resubmit the entire build with updated metadata, which delayed their product launch by four days — right in the middle of a paid campaign window. The team was frustrated, but the truth is: even a single mismatch between your app’s experience and what’s written in your listing can break compliance. Apple doesn’t just scan your code — they audit your promises.
You’ve tested every screen, triple-checked your metadata, and made your app reviewer-proof. Now it’s time to actually hand it off to Apple — and how you do that matters just as much as what you’re submitting.
Because submitting your app isn’t just hitting “Upload” and walking away. It’s about packaging the whole experience — build, notes, access, assets — in a way that makes Apple say “yes” without hesitation.
Here’s exactly what to include in your submission (and where) to keep your app out of waiting for review purgatory.
How your iOS app gets verified for the App Store
Let’s clear the air: your app isn’t being reviewed by a robot… but it’s not just a human either. The Apple app review process is a slick combo of automation and real-person scrutiny — all designed to protect users, uphold Apple’s standards, and make sure you’re not sneaking anything weird into production.
And if you’re sitting there staring at “Waiting for Review” in App Store Connect wondering what’s really going on — let’s break it down, step-by-step.
Step 1. The automated front line
As soon as you hit Submit for Review, your app is scanned by Apple’s automated systems — think anti-malware, quality checks, privacy filters, and yes, a bot with trust issues.
Here’s what they’re checking before you even reach a human:
- Malware, crashes, and unstable builds
- SDKs or frameworks that are outdated or disallowed
- Metadata mismatches — like claiming your app is free, but including IAPs
- Privacy triggers that aren’t explained (ex: requesting location without context)
- Forbidden API usage (this one trips up a lot of devs)
- Red-flag terms in your Review Notes like "crash", "test", "workaround", etc.
If your app fails this round? You’ll never reach a human app reviewer. That’s why it’s step one in what Apple calls its guideline reviews process.
Step 2. The human review — real people, real pressure
If your app passes the machines, it lands on the screen of a real Apple employee. These app reviewers are trained to review dozens of apps per day using a tight checklist based on the app guidelines — no guesswork, no emotions, just strict compliance.
They usually spend minutes, not hours, reviewing your app.
Here’s what they’re looking for:
- Does your app launch cleanly and function as described?
- Does the metadata match the in-app experience?
- Are permissions clearly explained in context?
- Are age ratings appropriate based on actual features?
- Are IAPs or subscriptions disclosed and transparent?
- Is the flow logical and accessible — even on first open?
Yaroslav Rudnitskiy, Senior Professional Services Manager at AppFollow:
“We had one client get rejected because the app asked for camera access immediately after launch — but the camera feature was hidden three taps deep and only visible for one user group “The reviewer couldn’t find it, assumed it was misleading, and flagged it. Boom. Rejection.”
Moral of the story? Make your app reviewer’s life easy. Don’t expect them to “figure it out.” You’re not demoing your app — you’re letting it speak for itself.
Step 3. When Apple has questions
Sometimes, even if your app seems solid, the review team hits pause and reaches out with questions. It’s not a rejection — it’s a request for clarity. But if you don’t respond quickly (or clearly), you’ll delay your entire pass and review process.
Here’s what usually triggers that:
- Missing login credentials or instructions
- Permissions without explanation (ex: asking for Bluetooth or health data with no context)
- Custom flows reviewers can’t access without extra info
- Lack of documentation for things like music rights, encryption, or third-party content
You’ll get an email via App Store Connect, usually within a few hours of hitting waiting for review. Here is how it goes:
1️⃣ App Store reaches out
You'll get an email with questions about your app. They might ask how features work or request login details.
To speed things up, include this info in the build description before submitting. Less back and forth = faster approval!
2️⃣ Clarify how the app works
Provide details on your app's functionality. Attach whatever’s needed: screencasts, documents, or a proper explanation in human language.
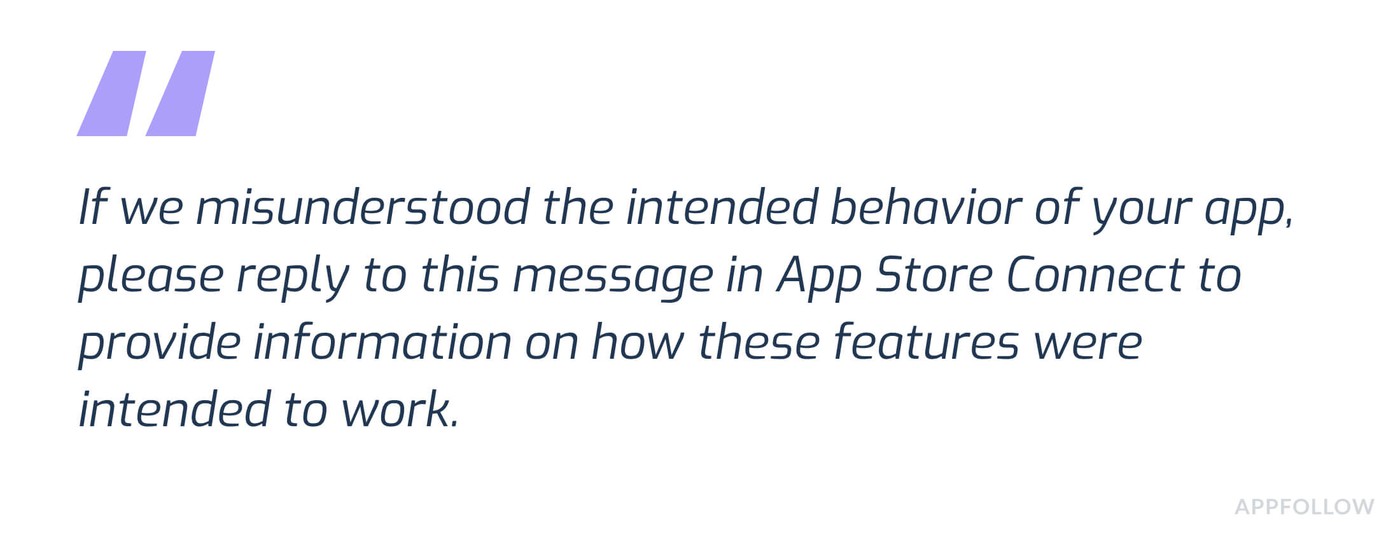
Following the app store review guidelines here is key. Make it super clear so they don’t have to guess.
3️⃣ Explain why your app needs this or that kind of data
If your app asks for user data, like contacts or location, the review team will ask why. You’ll need to explain what you do with that data and why it’s necessary. Privacy is a big deal in Apple’s guidelines (your users surely would appreciate some transparency too).
4️⃣ Cover the bases when it comes to rights
If your app uses any music, videos, or brand assets, you’ll need to confirm you have the rights to use them. This is one of those things that can delay approval if you’re not prepared, so make sure you have all the legal docs ready. And if your app uses any unique encryption, you’ll need to explain that too.
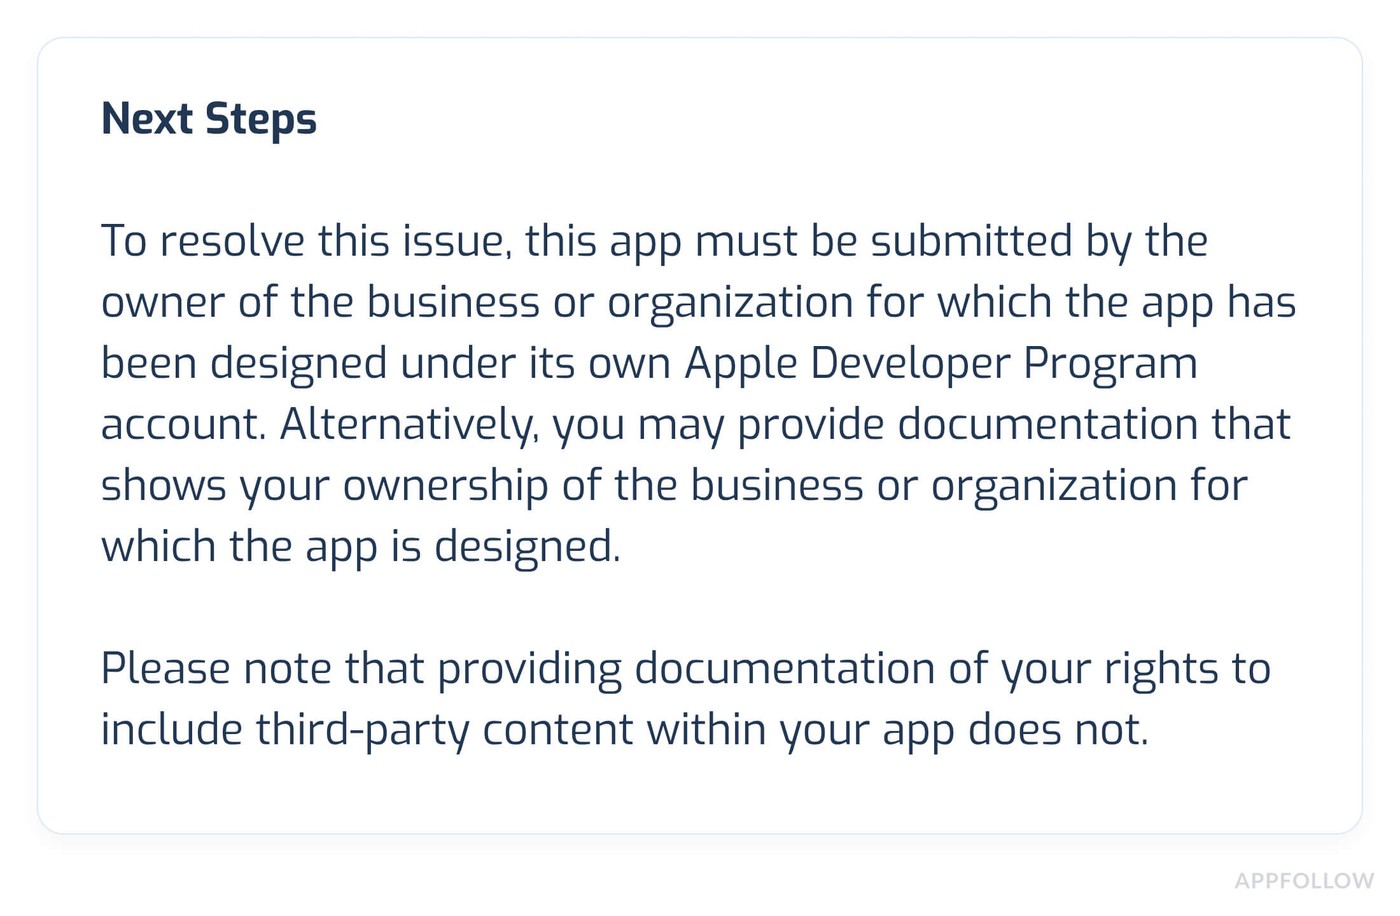
A request for documents confirming the publisher's rights. Image source.
5️⃣ Wait for the process to be finally over
The first app store review can take a while—sometimes up to a month—especially if your app has unusual features. But don’t worry, once you get past this, future reviews will be quicker. For minor updates, it’s usually fast. With the new app store review guidelines changes, you can even submit things like in-app events or product pages separately.
Lucija Knezic, Senior CSM & Product Strategy Manager at AppFollow:
“You’d be shocked how many rejections come from silence. If they don’t understand your app in 2 minutes, they’ll either pause it or reject it. You have to assume they’re reviewing at scale.”
A note on TestFlight: If you're testing with TestFlight and wondering how long does TestFlight review take — it depends. Internal builds can pass quickly. But for external testing, if you forget to enable public links or forget to add Apple to your testers, your app will sit untouched for days. Always double-check TestFlight access before submission.
TL;DR — Reviewers Aren’t Here to Guess. They’re Here to Approve (or Reject) — Fast.
If your app is stuck in “waiting for review,” don’t panic. But don’t assume Apple is just “busy.” More often than not, it’s because something confused the reviewer, triggered a question, or failed a check.
Your job as a developer — and especially as an Apple developer — is to remove friction, flag anything non-obvious, and submit a build that is clean, testable, and transparent.
Because when you respect the apple guidelines, understand the humans inside the system, and play by the evolving app store submission guidelines, you don’t just get through faster — you build long-term reviewer trust.
How long does Apple take to review an app?
iOS app review time is usually about 20 minutes, but it can take a few hours if it's complicated.
Keep in mind, apple app review time varies. Around holidays like Christmas or New Year, the team is very busy, so it might take longer. It's usually about 9 hours to start the review, and a full day to finish.
See also: the key to creating a solid reputation strategy. Don't miss out.
If something doesn't pass, you can hide it for now and publish the parts that got approved (pretty neat!).
Step 4 Double check submission settings before you hit go
A build can be uploaded and still never reach App Review. In App Store Connect, confirm the processed build is attached to the intended app version. Check the countries or regions, price, age rating, privacy answers, export-compliance response and release option. Then make the two submission actions explicit:
- Add for Review. Put the app version and any associated items into the submission. Verify the review account and Notes for Review one last time.
- Submit for Review. Open that submission and send it. Apple says an item is not submitted merely because it was added for review.
- Confirm the status. Record the submission ID and check the App Review page and the contact inbox. If an item develops an issue, reply in the same thread with the observed screen and reproducible steps.
Choose manual release if a campaign needs a deliberate go-live decision after approval. For a routine update, document who will check the live listing and app behavior after release. An approval and a release are two separate events.
cta_free_trial_purple
How long does App Store review take in 2026?
Apple reports that, on average, 90% of submissions are reviewed in less than 24 hours. That is a platform-wide measure, not a deadline for your app. An incomplete submission, inaccessible login, missing documentation or a purchase the reviewer cannot reach may take longer. Approval also does not mean the release is already live if you chose manual or scheduled release.
If your submission is taking longer than planned, start with its status in App Store Connect. Confirm that you completed Submit for Review, not only Add for Review. Check the review contact inbox and the App Review conversation for a request. Open the release account on a clean device and repeat the purchase, permissions and gated-feature paths; fix a failed credential or backend before it becomes another round trip. Record when the version entered each status so your team can distinguish a queue wait from time spent answering a question.
Does Apple review on weekends? Submissions can move outside your working hours, but Apple does not publish a weekend completion guarantee. Give a fixed launch a buffer and use a release option you control. Apple reserves expedited review requests for circumstances such as a critical bug fix or an app tied to an event you are directly associated with; include the reproduction steps or event details when you apply. A routine marketing deadline is not a reliable expedite strategy.
After approval: watch what the release does to reviews, ratings, and visibility
Passing App Review is not the finish line. It is the moment your update starts creating evidence.
A clean release can lift ratings, improve conversion, and turn new reviews into product insight. A messy one can do the opposite in a day: more 1-star reviews, slower support, complaints around subscriptions, or confusion about a feature Apple approved but users do not understand.
AppFollow helps teams watch that post-release signal in one place. You can track reviews and ratings across app stores, tag feedback by topic, catch sentiment shifts, alert the right team when something breaks, and connect user feedback with ASO and competitor visibility changes. That is the operational layer after “Approved”: what changed, who is affected, and what should we fix first.
cta_get_started_purple
App Review Notes template
Review Notes work when they let a stranger reproduce the feature you want reviewed. Here is an illustrative example for a local-events app with a paid organizer plan. It shows the level of detail to provide, not a credential set to copy.
Feature in this submission: Organizers can publish an event and view attendance reports. The new version also adds a location-based “Near me” feed.
- Sign in with the active review account supplied in App Review Information. The account is assigned the Organizer plan and contains two sample events.
- Open Organizer → Events → “Riverside Workshop.” Tap Edit, change the start time, save, and reopen the event to confirm the update. Open Reports to view the sample attendance chart.
- To test the location flow, open Explore → Near me and grant location access. If access is declined, select a city manually; the feed remains usable. The app requests location only when Near me is opened.
- The Organizer purchase screen is under Account → Plans. The product shown in the listing is available to this review account. The submission does not require a real payment to inspect the screen.
- User-posted event descriptions can be reported from the event menu. A user can block an organizer from the same menu; support contact is available under Settings → Help.
For your own submission, replace the route with the screens in the exact build, use a non-expiring review account with the necessary entitlements, and verify every step from a fresh installation. Put credentials in Apple’s designated App Review Information fields. If a feature needs hardware, a region, remote configuration or a special state, say which condition applies and how the reviewer can reproduce it.
Top reasons your app might flop in the iOS review process
A rejection notice usually names a guideline. The useful next move is to find the screen and state that produced it. Apple’s 2025 report lists Performance in 1,354,418 rejection records, followed by Legal in 495,673, Design in 415,532, Business in 283,820 and Safety in 151,159. One submission may appear under several sections. These are counts of cited sections, not mutually exclusive percentages.
If the notice points to… | Reproduce before resubmitting | The evidence that helps |
|---|---|---|
2.1, incomplete app or broken flow | Install the submitted build, use a clean review account and follow the exact screen path. | Crash log, build number, functioning backend and route to the feature. |
2.3, metadata mismatch | Place the listing screenshot and claim beside the real screen and price. | Corrected asset or metadata plus a matching capture from the build. |
3.1, purchase not visible or confusing | Open the product from the review account in the relevant storefront. | Product status, paywall screen and steps in Review Notes. |
4.2 or 4.3, insufficient value or spam | Demonstrate what the app actually enables and how it differs in a crowded category. | Product walkthrough and the specific user action or content unavailable in a generic clone. |
5.1 or 1.2, privacy or user content | Decline permission, review the fallback and test report/block paths. | Purpose string, consent, policy and moderation screen. |
Here is a real case from MUD Icon Generator:
Co-founder Furkan Kaplan wrote that MUD had sold in-app purchases and users spent more than eight minutes per session. Apple still raised concerns about the lasting value of paid content and the paywall under guideline 5.6.4.
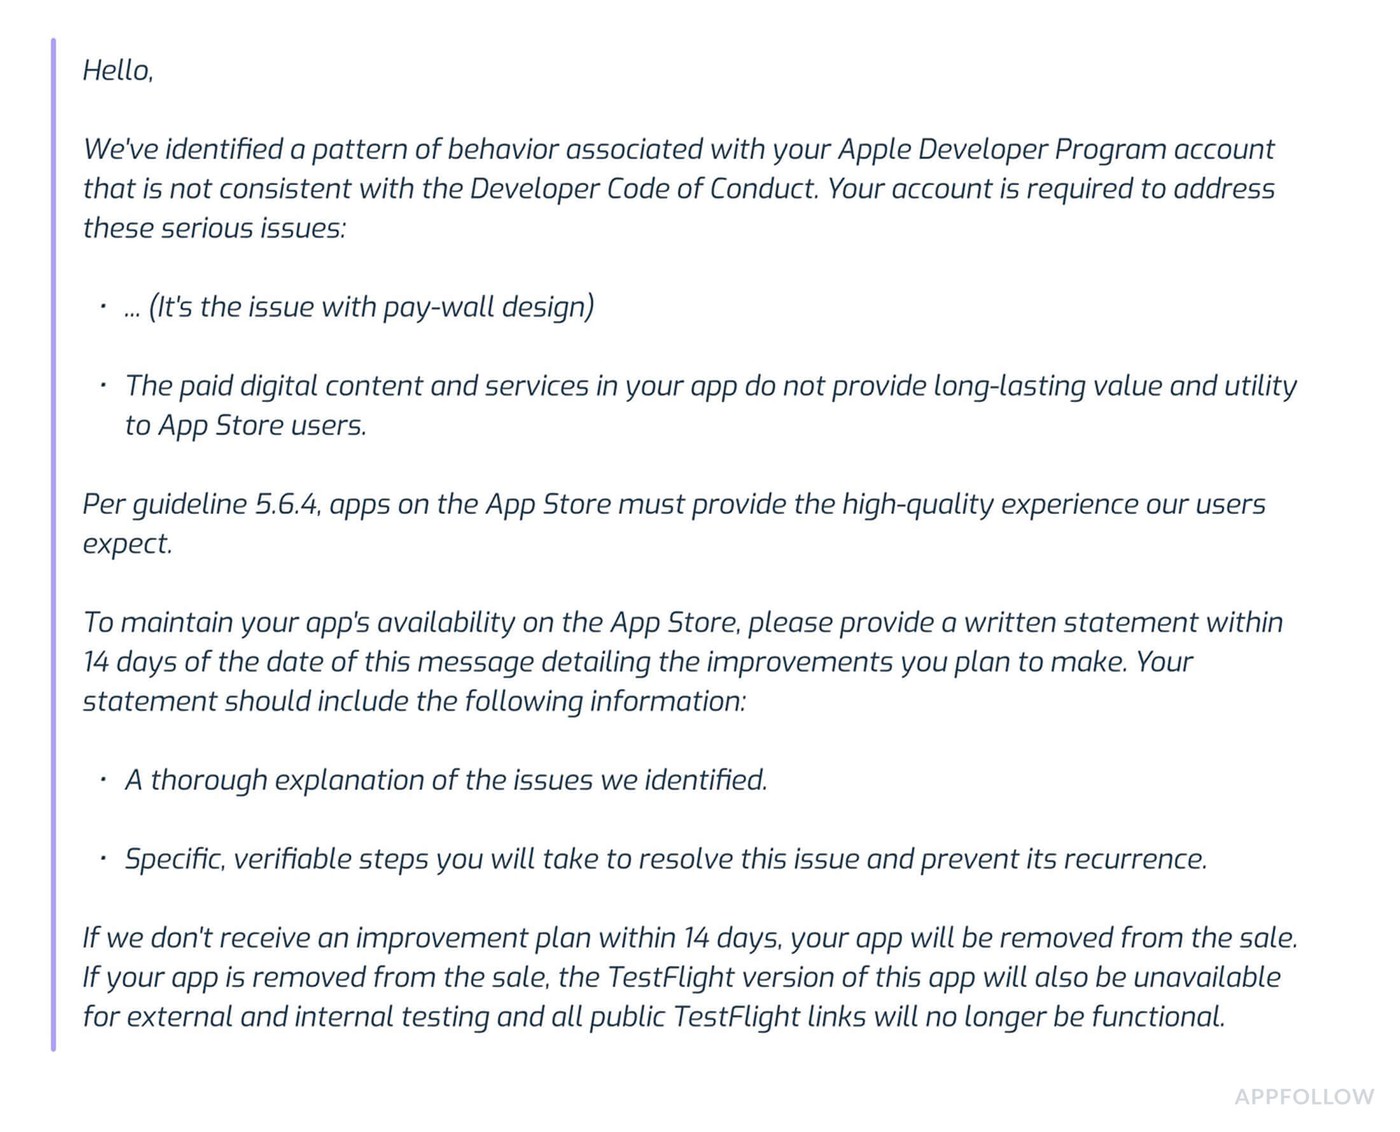
Its message asked for a written improvement plan within 14 days; a later response asked for specific, verifiable new features or content. Kaplan said the team could not make that change in time and removed the app itself. Engagement did not answer Apple’s product-value concern. If your category is crowded, show the reviewer the feature or content that creates continuing value, and keep a plan that can be verified in the build. This is one developer’s account, not a rejection-rate benchmark.
Here are just a few more anonymized (but very real) examples of review fails:
- TestFlight Timeout: Developer forgot to enable Apple’s access on the external build. App sat unreviewed for 7 days.
- Misleading Pricing: Listed the app as “Try Free” in the subtitle, but users hit a paywall immediately. Rejected for violating app guidelines around monetization transparency.
- Silent Permissions: Asked for access to health data without a single sentence of explanation. Privacy violation — rejected instantly.
- Metadata vs Build Mismatch: Claimed a $4.99 subscription in metadata, but pricing in-app was $5.99. Flagged for misleading listing, violating apple app guidelines.
Unfortunately, as with all app stores out there, it’s a service you use, which means you are at their mercy. But enough with the doom and gloom, you’ll make it! Especially with this in hand.
5 checks before you submit
These are the hard-won lessons we’ve gathered from hundreds of AppFollow clients navigating the Apple app store review — plus plenty of war stories from our own team. We’ve seen what gets apps approved fast… and what sends them straight into “Rejected” purgatory.
Below are my teammates personal secrets to help you submit with confidence, stay compliant with Apple guidelines, and avoid the red flags that stall so many launches.
Always match Your UI to what you submit
Ilya Kataev, Professional Services Team Lead at AppFollow:
“Don’t upload screenshots or previews that don’t match the actual UI. I get it — design iterations move fast. But if you leave outdated UI in your submission, Apple will flag it under app store requirements for misleading visuals. We’ve seen apps delayed by days just for an old button that was renamed in the latest build.
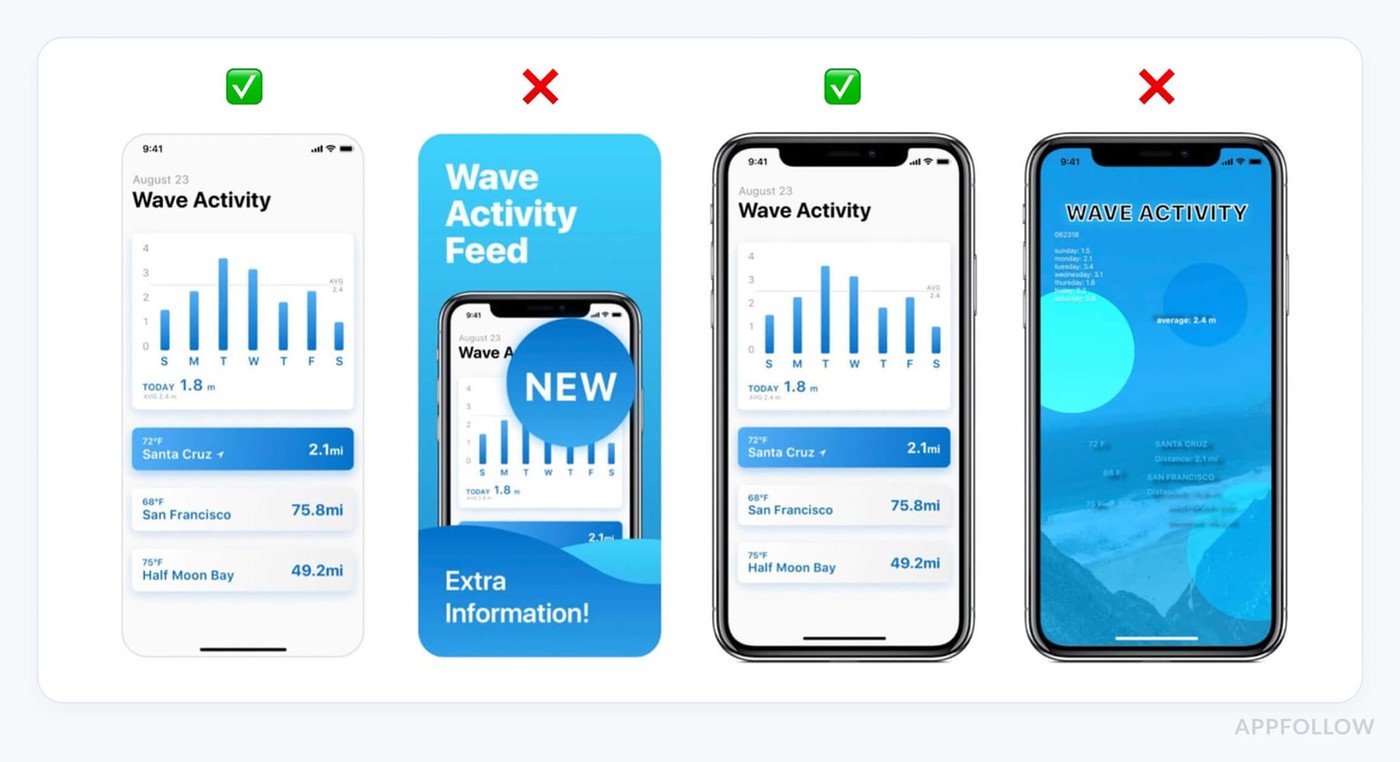
Official examples: UI Design Dos and Don’ts
Make sure every image in your listing reflects the current functionality — that includes language, layout, and features. Don’t leave anything in ‘just for now.’ It’s never worth it.”
Your app description is a contract — write it like one
Karen Taborda, Customer Growth Team Lead at AppFollow
“The app store description guidelines aren’t optional — they’re the first thing a reviewer reads after your app launches. Think of your description as a contract between you, your users, and Apple. Every word has to be clear, accurate, and testable.
Leave out the fluff like ‘#1 in the world’ or ‘Life-changing experience.’ Apple doesn’t care — and neither do reviewers skimming through 50 apps before lunch. They care about what the app does, how it works, and whether what you wrote actually happens inside the build."
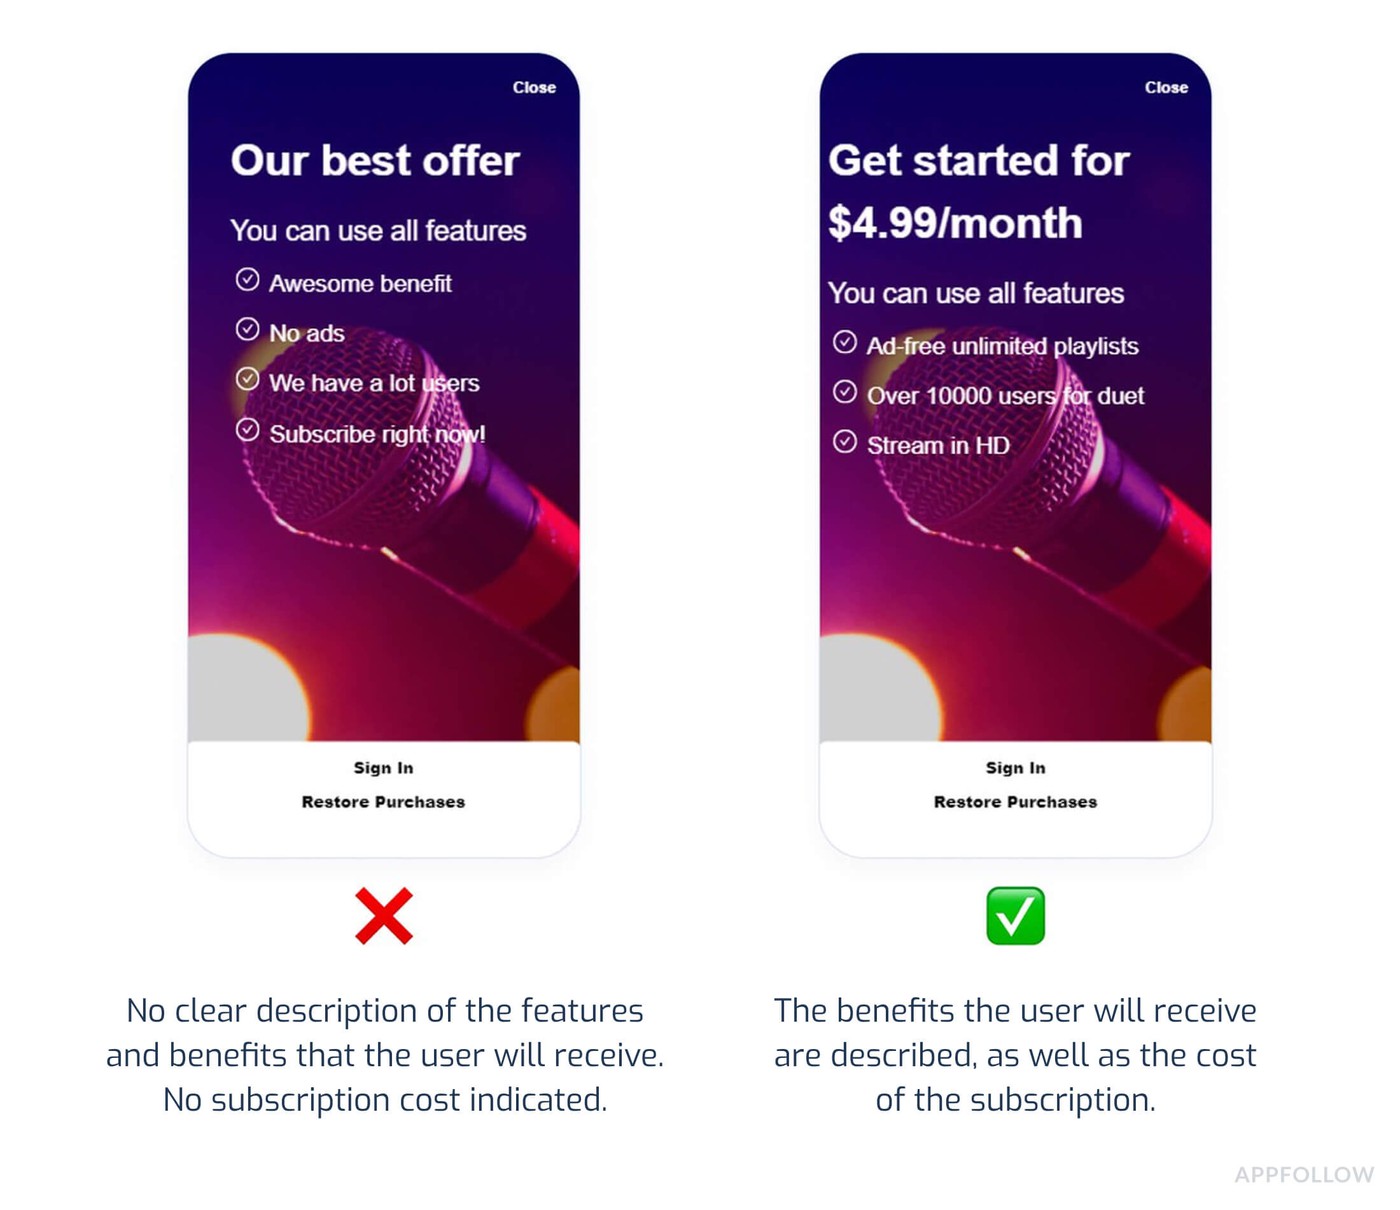
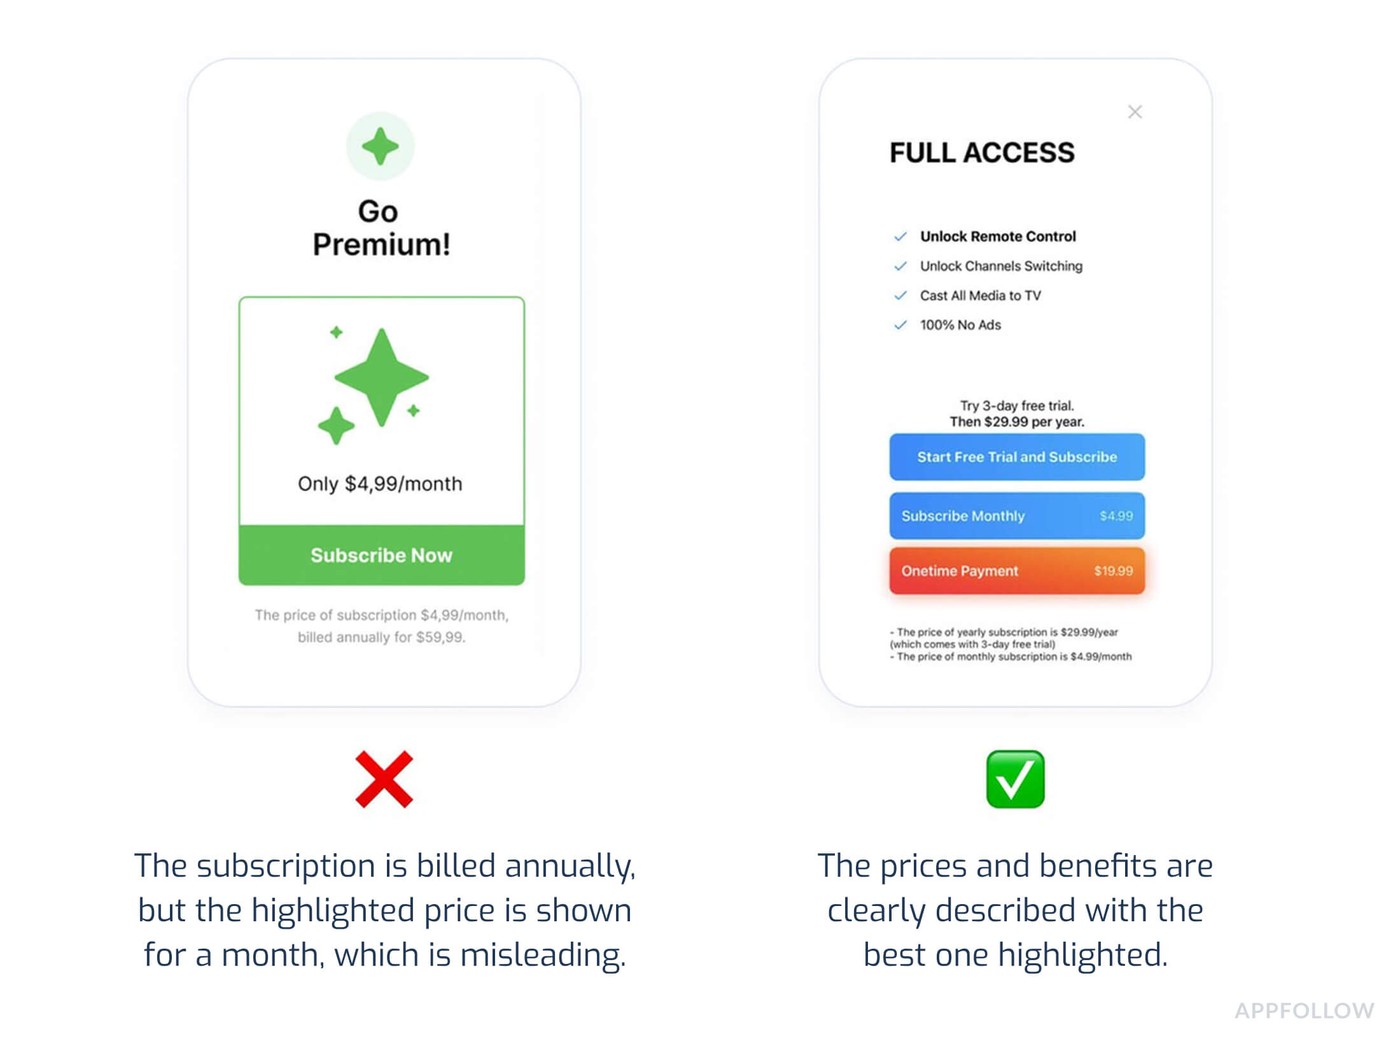
One client listed their subscription at $4.99 in the description. In the app? $5.99. That tiny inconsistency got them rejected under the apple app store review process — and delayed their launch by a week.
Here is Karen’s personal pre-submission checklist:

A clean, honest description isn’t just for Apple — it improves conversions too. The more clearly users understand what they’re getting, the more likely they are to install and subscribe.
Clean up your metadata
Dzianis Shalkou, Senior Professional Services Manager at AppFollow
“We’ve seen apps get blocked for sneaky keywords in their subtitle — even ones that were fine six months ago. That’s because app store metadata guidelines evolve quietly, without fanfare. Apple now flags anything that feels spammy, stuffed with buzzwords, or unrelated to your app’s actual features."
For example, avoid using competitor brand names or phrases like ‘#1 photo app’ unless they’re 100% justified in your product. And never recycle the same blurb across localizations — reviewers actually check that stuff now, and mismatches across markets are a growing reason for rejections.
It’s easy to think of metadata as a marketing tool. But in Apple’s eyes? It’s part of your compliance footprint. If it doesn’t align with what’s in the build, it could quietly kill your submission.
Don’t skip the permissions walkthrough
Lucija Knezic, Senior CSM & Product Strategy Manager at AppFollow:
“If your app asks for health data, location, or background activity, but doesn’t explain why — that’s a red flag. Reviewers don’t guess. If they feel uncomfortable or confused, they’ll reject. Plain and simple.
Use the Review Notes section to outline exactly what you’re doing with sensitive data, and why. For example: This app requests location access to display nearby events based on the user’s current city. This feature is only used when the “Local Events” tab is selected, and is never accessed in the background.
Reference the relevant apple app guidelines where needed. You’d be shocked how many approvals we’ve rescued just by helping a dev write a clear, respectful explanation.”
Follow the rules even if you’ve passed before
Yaroslav Rudnitskiy, Senior Services Manager at AppFollow:
“Just because Apple approved your app last time doesn’t mean they’ll approve it again. We had one client who got re-reviewed for an old app update because apple app store rules had changed — specifically around webviews hosting external games.
It passed in 2022, failed in 2023. Always check for updates before resubmitting. Read the latest apple guidelines, especially around monetization, tipping, or third-party SDKs. What worked before might quietly break your next review.”
What’s New in App Store Review Guidelines (2026 Edition)
Apple made a few updates to the App Store review guidelines, and even if they seem small, they can totally affect whether your app gets approved smoothly or gets caught up in delays.
We’ve been watching these changes roll out through client cases, support threads, and Apple’s documentation. So here’s a quick breakdown of what’s new in 2025, what changed, and why it matters if you’re submitting any time soon.
1. Section 5.1.1 Got Tighter Around Privacy
The app store review guidelines 5/1.1 — the one about data collection and user privacy — now asks for even more clarity. Apple’s being extra cautious about how apps request access to things like location, contacts, or health info.
Here’s what’s new:
- You need to clearly explain why each permission is needed — both inside the app and in the Review Notes
- If you can offer limited functionality without access, you’re expected to do that
- You’ll also need to say how the data is used and stored, especially with anything sensitive
These kinds of updates can quietly cause rejections if you’re not ready. And Apple’s not always loud about them — so it’s good to check before every submission.
2. AI Features Are Getting More Scrutiny
If your app uses AI in any way (even for something small like generating text or visuals), expect more questions during review.
Apple now wants:
- Clear explanations of what the AI does and how it works
- Proof that it won’t produce misleading or unsafe content
- Built-in reporting or moderation if users can interact with AI-generated output
We’ve seen some apps delayed just because the team didn’t mention the AI component in their Review Notes. So it’s not just about the feature — it’s about making sure reviewers understand how it’s handled.
3. You Can Now Submit Pages and Events Separately
Here’s a nice one: you no longer need to submit a full app update to get your in-app events or custom product pagesreviewed. You can send those through individually.
If you’re running promotions or updating App Store content mid-cycle, this saves a ton of time. You can update just the event or landing page without pushing a whole new build. This is one of those quiet app store review guidelines changes that’s really helpful when you know about it — but easy to miss if you don’t.
4. Subscription Screens Must Be Crystal Clear
Apple’s tightening up the rules on how you present pricing and plans. Now they expect:
- Clear pricing before a user hits a paywall
- Transparent plan comparison without extra clicks
- No auto-defaulting to the highest tier by design
Why it matters: we’ve seen apps rejected for things like hiding the pricing behind a tap or making it unclear what the free trial converts to. Just showing a clear, fair pricing screen upfront can make the difference between “Approved” and “We need more info.”
Even though these updates might look minor, they can seriously affect your app’s review outcome. And since Apple revises methods store rules to reflect things like regulatory pressure and user trust, it’s worth checking every time — not just once a year.
Once your app is approved, the real work begins staying visible, competitive, and responsive
That means keeping a close eye on your reviews, fine-tuning your ASO, and making sure every update improves your store performance, not hurts it.
This is where AppFollow makes your life way easier
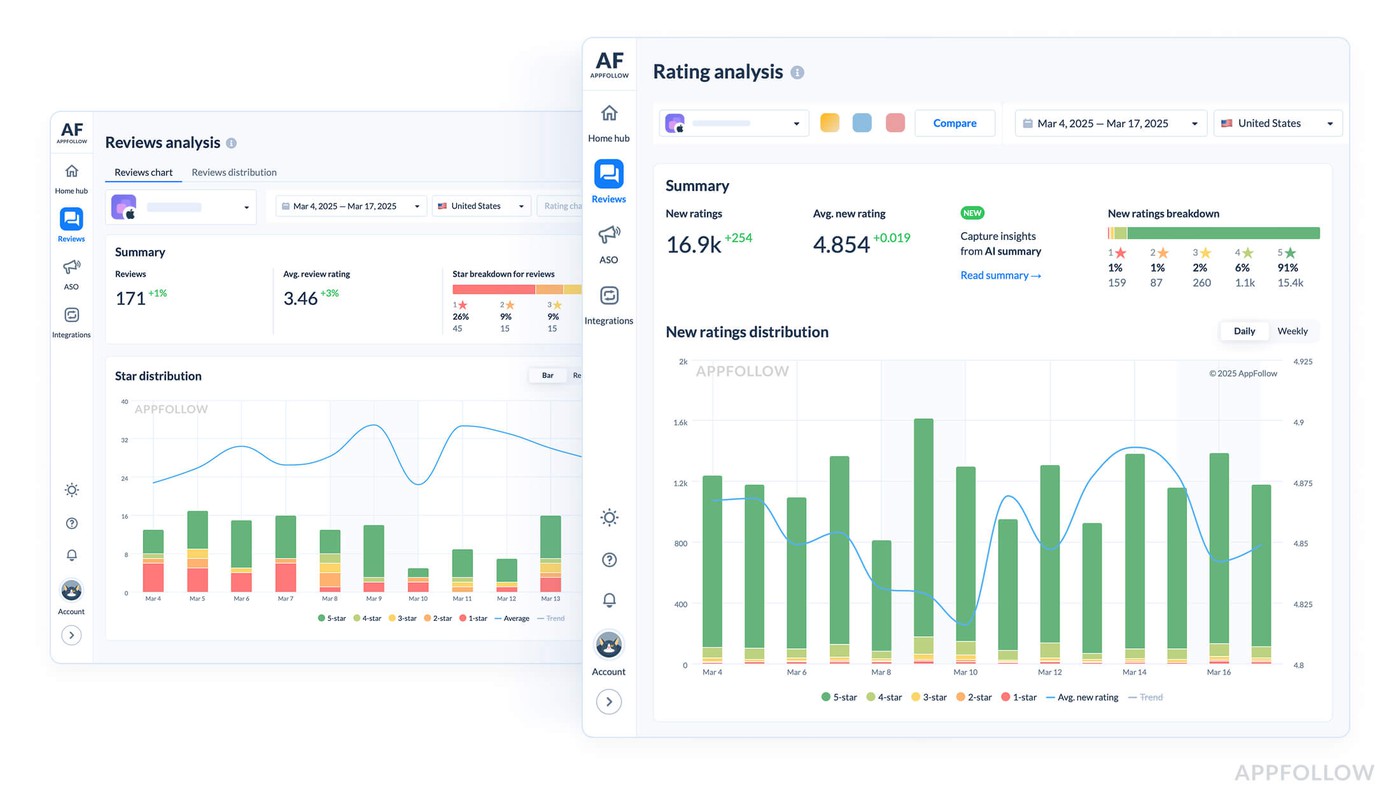
You can monitor and reply reviews across countries, auto-tag user feedback, track keyword rankings, and even respond to users — all from one dashboard. And with automation baked in, you’ll spend less time digging through spreadsheets and more time improving what matters.
cta_get_started_yellow
Read also
Bad reviews killing sales? Fix it with online reputation management
Android App Analytics Explained by Pros: 5 Lifehacks & Tools
How to Read App Ranking Analytics and Find Growth Gaps
Crack App Analytics: Expert Guide to Win the App Store Game in 2025
Guide to App Store Analytics: Find the Data, Follow the Clues, Grow